Sunday, November 25, 2018

I Grey Washed My Fireplace

For several years now I have been wanting to do something
to my rock wall fireplace.  

Here is the before picture.


The rock covers the entire wall of the living room, and just a bit around the
side about a foot.  I used to have a waterfall in it, but
 it has never worked as long as we have lived
 in our house, almost 30 years.    Thank Goodness.  Raising
kids it would have been a disaster with water in the
living room!

I finally talked Dana into letting me update the rock look.
It has been a challenge to do this, as men love rock and wood, at
least my man does.  I have always wanted to paint the wood ceiling
and that was never a go, but I did finally get the go ahead
for the grey wash on the rock.


Here we are!  Washed grey!

This was so easy!  
I used Mindful Grey Sherwin Williams paint.
I put 1 part paint to 10 parts water.
I used a 6 inch brush and brushed the watered down
paint on the rocks.

That is it!!!!

All you need is a quart of Mindful Grey, a small container, I used a
large yogurt container, and a 6 inch brush, and water!
Voila, you have all you need.


I decorated the wall just for fun so I could get the vibe of how
it will look after Christmas.  And not very good photo
but one to let me put it back together again.


Christmas soon to come.

What do you think?

Ciao,

Robin


Friday, November 16, 2018

Fall Watercolor Paintings

I have been practicing my watercolor art.

Usually I paint flowers, but I took a class a few months
ago and so I tried a few different painting
which are very out of my comfort zone.


I've been wanting to paint a window with a rocks
around it.  This is my first try on this, I'm sure there
will be many more to come, but trying to get
out of my comfort zone.


Then my daughter bought a princess pumpkin while I was
visiting her, and I decided to paint it one evening.


Oh how I love how it turned out.
I must try more pumpkins when time allows.

I wish I had painted more this fall.
But alas, this with change in time.  I will
have more time in the winter.
The yard took my time this fall while 
I was back from California.

Let me know what you think of my
try at watercolor paintings.
They are not the best, but I will
continue to practice until I get  it right.

Ciao.

Robin

Sunday, November 4, 2018

Book About Home 3

Today I am sharing the rest of my "HOME" mini album.

Here is the cover of the book again, just a recap from last weeks post.

Here is the first pages of the book.

A picture of Dana and I,  
I always say "This is the house that Dana built."
You know like the nursery rhyme I remember from my
younger years, and reading to my kids.

My husband loves to do things with his hands,
to build, to create, and to work.
So we have to put a lot of credit to him for what this house is
today, because he did make it what it is today.


I used the new Saffron Sunrise embellishments for this
page, and Gina's Designs.
I will post all the papers at the end of this blog post
that I have used in this book.
This photo on the right side is the side of our house
with flowers growing in our planters.
Summer!

This is my dream house.
I love the fleur de lis.  One of my favorite motifs ever.
I took this off left over fabric that are curtains in our bedroom.


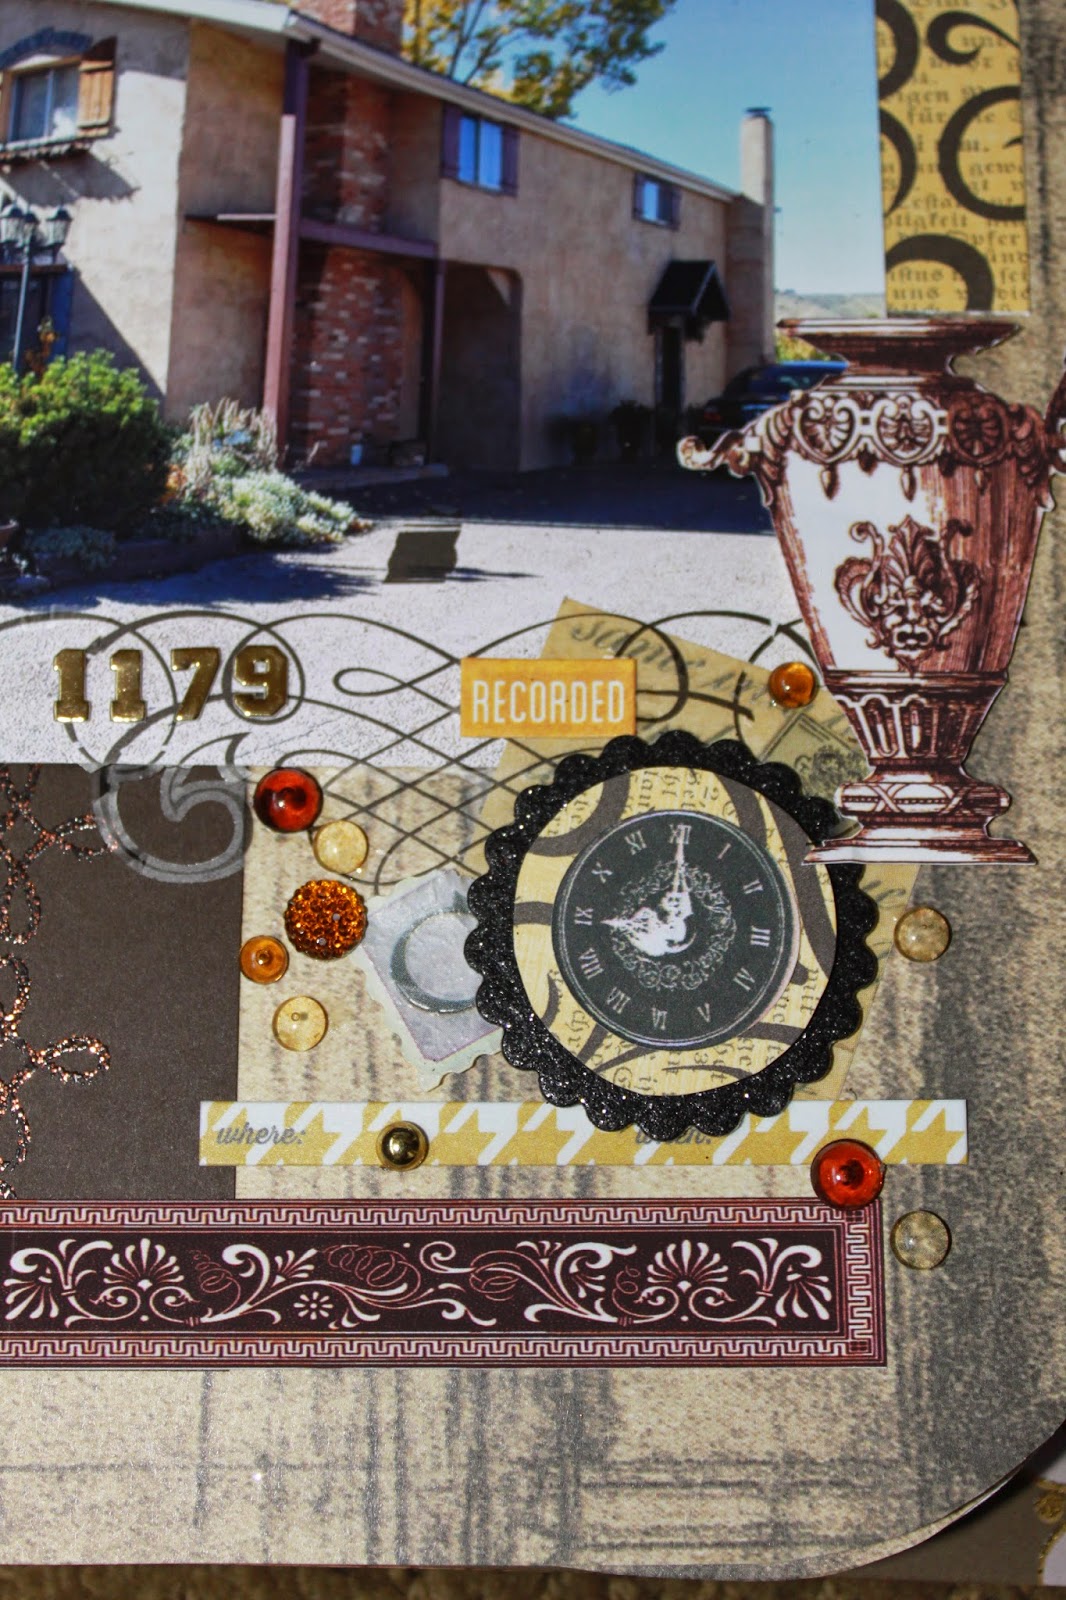
Page 2 of the book actually show our house and the 
balcony off the back of the house.

Here I have used more of the Saffron Sunrise line, and other 
papers from our product line, again these will all be
at the end of the post.


So fun!!!
Glitter Chipboard, Saffron Sunrise paper,
and a clock from our sticker line.


Page 3 of the book.
I forgot to tell you that the pages of the inside of the book are made of 
mat board.  When a center in cut from a mat for a 8x10 picture, there is the
center left over.  These pages are made from the centers of mats.
(We used to own a frame store, these are from that store,
but you can go to any framing store, I'm sure they have scads of these!)

I feel everyday like I really live in a Villa.


Again these little rectangles come from the inside of cut mats.
Just leftovers that usually get thrown away.
I put the letters Villa on these rectangles.

This is my first page that has a number,
This is from Gina's Designs, 
I fell in love with these. 


Page 4 of our book is the garage.
Our garage is detached, and for the first time in 30 plus
years, I was able to park my car in the garage!!!!


Close up of the page elements.


Page 5
The yard and gardens of our home.
Love the white lilacs in the spring.


Page 6 of the mini album.
The fountain and back of the house.
I bought the fountain without Dana, wasn't sure if he was
gonna still love me after that, but it is so relaxing for
me to hear the water run.  
I love the fountains all over Mexico and Europe.


Close up of the elements of the page.

Again, I have used the
Saffron Sunrise line for these elements.


Last page of the book,
the clip board is the back of the book.


Dana is a Johnny Appleseed.  
This is his row of apple trees in the spring in full bloom.
It is One Fine Day everyday here.
I love each and every moment I spend here at our home,
more than anything, 
I love each and every moment that is spent with Dana.
He is the joy of my life for sure.


Again the tag on front of the book.
The book completed!

How great is my joy!
So glad I could share some of me with you.


Hope you enjoyed this book!

Ciao,

Robin


Sunday, October 28, 2018

Book about Home 2

Hello!

I have been working on this for a few months on and off.
I started it with the cover of the album and the
clip board, then stopped. 
Somehow could not get myself to keep going
until I had some actual pictures of the house.  I had some
but not the ones that could get me inspired to
get to the next level of finishing the book.

Here is my cover to the album, and the details.
I am so pleased with how it has come out.
Love the colors of these papers, because,
this is the color of my European inspired home.

I'm sure that it is hard to believe, that I did this finish on the 
stucco of our home long before it became the thing.
Dana put scaffolding around the house, and as I 
had time in the summer, I would take a day (and it took
many, many weeks) and paint the
finish by hand, every inch of the outside of our home.
So there is a lot of love and time put into this silly idea.
Now I know you can do this with a sprayer, and get a more even
look.  I was trying to mimic houses that I fell in love with,
in France and Italy.


The idea of this book is to have that European look,
but because we live in the country with an acre of land
I wanted it also to have the look of country,
I love Nests, thus the focal point of the front of the book.


So my mini album about our house had to have that same look.
European Splendor
a nest for me, and the look I love.

I used these papers.
Honeycomb Fleur linen CS, Cathedral Paper,
Honeycomb Daisy Linen CS, Mocha Daisy CS
Coffee Cream Classic Swirl

Honeycomb Fleur Cardstock
Honeycomb Daisy Glitter CardstockMocha Daisy Glitter CardstockCoffee Creme Classic Glitter Cardstock

I started with a frame cut from mat board.  It doesn't matter what color,
you can use an old mat board frame.  I then covered it with the Cathedral
paper.  The pattern for this paper does come from a trip we took
to Italy, I found it in a paper store in Florence.

I have been saving this nest picture for at least 10 years.
It is from the artist Marjolean Bastian.  I love her
work, I have several of her books, and cards, and this 
picture.  She is an amazing artist.

I put this picture in the frame, then added glued the word home to the top edge
of the frame.


Orangy colored ribbon, a fleur de lis book mark in silver top the
book.  I hand cut the "home" letters from the honeycomb fleur,
and also from our chipboard, and covered the chipboard with the fleur home cuts. 
I wanted them to be very sturdy.

I then went through my stash of scrapbook stuff,
made flowers with punches, then sprayed them with water, crinkled 
them in my hand and let them sit overnight to dry.

Then, I just started adding items as I liked.
Even used a pin from my mother's jewelry to the book.


This is the edge of the mini with all the pages stacked on top.


More close ups of the mini.


Close ups of the hand made flowers.


I used dew drops and tear drops on the flowers.
Tear drops make great leaves.


This is the tag on the top of the clip board.
And a picture of the side of our house of the door we use the most.
It is the only picture of the house that you see
on the cover of the book,
because the rest is in the inside pages of the book.


I am so excited to share this treasure of a book with you.

I hope you enjoyed it.
Next week I will share the inside pages of the book.


Have a great day,
remember you can find these products on this website.

www.robinsnest-scrap.com

Ciao,

Robin

Sunday, October 21, 2018

Easy and Elegant Halloween Table Scape

I arrived home a few days ago after being gone for 
nearly three weeks.  I wanted
to set the table for Halloween, yet at the
same time I did not want to take out all of our 
Halloween decorations!  
The month is half over already,
so to take things out for a few days just 
didn't sound great to me.

While I was gone, I found this grey, orange, and white 
tablecloth, thinking it would be awesome for
a Halloween table scape.
I really have taken a liking to grey and orange lately.


For fun I decided to set the table for only 4, and move 
the chairs so they all faced each other 
along the long side of the table.  I think I will
use this more often.


I bought the table cloth at Home Goods.


 Then the table setting.
I used a grey place mat, which I purchased at Home Goods also.
The orange napkin is from World Market. and the script napkin is from
Pier 1, all purchased in 2018. 


The dishes consist of a creamy white charger, purchased at Savers
(my favorite second hand store), a grey dinner plate, purchased
at a yard sale a black dinner plate, also from Savers, a black and white
bowl, from Savers, (it came white, but I colored
it black and white diamonds with a black felt pen),
and a dessert plate in black and white bird scene from
Mary Carroll Collection.


The silverware is just flatware, Michelangelo (Oneida)
these were from my mother's things, and are now
in my collection, and a silver napkin ring.
I collect silver from where ever I can find it, yard sales,
second hand stores, etc.


The goblets were given to a friend of mine at her wedding,
about 40 years ago,
and she got tired of them over the years, I bought them
from her, just loving them! 
When I visited my kids this fall, they had goblets
from "The Pioneer Woman" that were
quite similar to these, in 4 different colors.


Then I added three silver pieces to the center of the table.
When we eat dinner I will serve our food in these serving dishes.


 While I was shopping one day with my daughter in California
I found this napkin in grey and orange at Williams Sonoma.
It comes in a tablecloth, a runner, placemats, and
napkins.  I fell in love with these colors!!!!
This napkin sits under the silver pieces in the center
of the table.


This pillow I found at JoAnns, just a few days ago.


All of the items on this table scape are items from my 
dish stash in my cupboards.
None of them are singular to Halloween,
but still it gives the look of the holiday.

My dinning area is small, but perfect for our
home.  I love to set the table and leave
it set for the holidays.  I simplified my life by 
just finding things in my cupboard
and not having to unpack all
my Halloween boxes for a festive  and 
elegant look.


A few years ago I received my mothers china cabinet.
I grey washed it, as it was a stained wood,
and wanted to update it to the furniture look of today.


I added pumpkins to the dishes inside of the
china cabinet.


I'm quite happy with this fun Halloween look.
Elegant yet simple.


I hope you enjoy this fun look,
and feel inspired to find dishes in your
cupboards to create a fun
Halloween look.


Enjoy!

Robin